Wednesday, February 19, 2025

Step-by-Step DIY Wooden Retaining Wall Plans for Landscaping

Posted by myname with No comments

Build Your Own Majestic Wooden Retaining Wall: A Step-by-Step DIY Guide

Transform your landscape and conquer unruly slopes with a stunning, DIY wooden retaining wall! This comprehensive guide walks you through each stage, from planning to final touches, empowering you to create a beautiful and functional addition to your yard. Forget expensive contractors; with a little elbow grease and these instructions, you'll build a wall that reflects your personal style and boosts your property's value.

Phase 1: Planning and Preparation – Laying the Foundation for Success

Before you even touch a tool, meticulous planning is crucial. Start by carefully surveying the area. Determine the exact length and height your retaining wall needs to be. Consider the slope's angle and the type of soil; a steeper slope or loose soil will demand a more robust structure. Sketch a detailed design, noting the placement of each post and sleeper. Obtain the necessary permits from your local council – this step is vital and avoids future complications. Finally, gather your materials: pressure-treated lumber (resistant to rot and decay), gravel for drainage, landscape fabric, post hole diggers, levels, measuring tape, and safety gear (gloves, safety glasses, etc.).

Choosing the Right Lumber

The success of your retaining wall hinges on using durable lumber. Opt for pressure-treated lumber specifically designed for ground contact. This treatment protects the wood from rot, insects, and decay, ensuring your wall stands the test of time. Calculate the quantity of lumber needed based on your design, adding extra for potential cuts and mistakes. Consider using thicker sleepers for taller walls to increase stability.

Preparing the Ground

Digging is the next critical step. Precisely mark the location of your wall using string lines. Excavate trenches for the posts, ensuring they're deep enough to provide solid footing (typically at least 1/3 of the post's height). The depth of the trenches will also depend on your soil type and local frost line. Create a sloped base for improved drainage. This prevents water from accumulating behind the wall, which could cause pressure and instability.

Phase 2: Construction – Bringing Your Design to Life

With your groundwork complete, it's time to assemble your wall. Follow these steps to ensure a sturdy and aesthetically pleasing structure. Remember to always prioritize safety by using appropriate tools correctly.

Setting the Posts

Position each post accurately within its trench, ensuring they are plumb (perfectly vertical) using a level. Fill the trenches with gravel to provide excellent drainage and to help anchor the posts. Pack the gravel firmly around the posts to eliminate any gaps. For added stability, consider using concrete to secure the posts, especially in unstable soil.

Attaching the Sleepers

Secure the horizontal sleepers to the posts using galvanized screws or bolts. Maintain consistent spacing between the sleepers for a uniform appearance. Before fastening, check that each sleeper is level. To prevent warping, pre-drill pilot holes to reduce the risk of wood splitting.

Adding Landscape Fabric

Before backfilling, layer landscape fabric along the back of the wall. This fabric prevents soil from seeping through the gaps in the wood and behind the wall, while allowing for proper water drainage. Secure it with staples or landscape pins.

Phase 3: Backfilling and Finishing Touches – Completing Your Masterpiece

The final stage transforms your framework into a functional and attractive retaining wall.

Backfilling

Carefully backfill the area behind the wall with soil, compacting it in layers to prevent settling. Avoid compacting the soil too tightly close to the wall, as this could put undue pressure on the structure. Leave some space between the soil and the wall to allow for drainage.

Finishing Touches

Once the backfilling is complete, consider adding a layer of mulch or gravel to enhance the aesthetics and provide additional erosion control. Plant shrubs and flowers to further integrate the wall into your landscaping. Inspect your wall regularly for any signs of movement or damage, and address them promptly to ensure long-term stability.

Congratulations! You've successfully built your own stunning wooden retaining wall. Enjoy your new landscape feature and the satisfaction of a job well done.

Step-by-Step DIY Wooden Fireplace Mantel Plans for a Cozy Home

Posted by myname with No comments

Build Your Own Cozy Fireplace Mantel: A Step-by-Step Guide

Hey there, fellow DIY enthusiasts! Are you dreaming of a cozy fireplace mantel, but the prices at the furniture store are making your wallet weep? Don't despair! Building your own mantel is totally doable, even if you're a beginner. I'm going to walk you through it, step-by-step, in a way that's easy to understand, even if you're more comfortable with a hammer than a measuring tape (although, knowing how to use both is always a plus!). This project is all about creating that warm, inviting atmosphere you've been longing for, and the best part? You get to customize it exactly to your style!

Planning Your Perfect Mantel

Before we even think about sawing wood, we need a plan. This isn't rocket science, but a little forethought goes a long way. First things first: measure your fireplace opening. Seriously, grab that tape measure and get accurate measurements of the width and height of the area where your mantel will sit. You'll also want to note the depth – how far it sticks out from the wall.

Choosing Your Wood

Now for the fun part: picking your wood! The options are endless! Here are some popular choices:

  • Pine: Affordable, readily available, and relatively easy to work with. It's a great option for beginners.
  • Oak: A classic choice that's known for its durability and beautiful grain. It's a bit more challenging to work with than pine, but the results are stunning.
  • Reclaimed wood: Adds a unique character and a touch of rustic charm. Just be sure to check it for any damage or pests before using it.
  • Cherry or Walnut: For a truly luxurious look, these hardwoods are worth considering. They're pricier, but their rich tones and elegant grain make them a worthwhile investment.

Remember to factor in the width of the wood you choose. You'll likely need boards that are wider than the actual fireplace opening to create the overhang. Think about the overall style you want to achieve – rustic, modern, farmhouse – and choose wood that complements your aesthetic.

Designing the Mantel Shape & Size

Sketch out a basic design! Do you want a simple, straight mantel? Or something more elaborate with curves or decorative molding? Consider the overall style of your room and how the mantel will fit in. Once you have a rough sketch, finalize the dimensions based on your measurements. You'll need to determine the length, depth, and height of your mantel. Remember that you'll need to account for the support brackets as well.

Gathering Your Tools and Materials

Now that you have a plan, let's get those tools ready. You'll need:

  • Measuring tape
  • Pencil
  • Circular saw or miter saw (a miter saw is recommended for cleaner cuts, but a circular saw works too!)
  • Safety glasses (Seriously, eye protection is crucial!)
  • Wood glue
  • Wood screws (Choose screws that are appropriate for the type of wood you're using.)
  • Drill with drill bits
  • Level
  • Sandpaper (various grits)
  • Safety glasses (I'm saying it again because it's that important!)
  • Wood filler (optional, for filling nail holes)
  • Paint or stain (optional, to finish the mantel)
  • Your chosen wood
  • Support brackets (metal L brackets are commonly used)

Building Your Mantelpiece

Alright, let's build this thing! This is where the actual construction begins. Assuming a relatively standard rectangular mantel, here's a basic approach:

Cutting the Wood

Using your measurements, cut the wood to the appropriate length and depth for your mantel. If your mantel will have decorative molding, cut the pieces for that as well. Remember to always measure twice and cut once! Accurate cuts will make a big difference in the final look.

Assembling the Mantel

Apply wood glue to the joints where the pieces meet. Then, secure them together using wood screws. Pre-drill pilot holes to prevent the wood from splitting. Make sure the screws are countersunk (meaning they sit slightly below the surface of the wood). Use your level frequently to ensure everything is square and level.

Installing the Support Brackets

This is crucial to prevent your beautiful mantel from crashing down. Attach the support brackets securely to both the mantel and the wall, ensuring they are properly aligned and strong enough to support the weight of the mantel. Use screws appropriate for your wall type.

Finishing Touches

Once the mantel is securely mounted, fill any nail holes with wood filler and let it dry. Then, sand everything down smooth, using progressively finer grits of sandpaper. This will create a beautiful, smooth surface. Finally, if you're painting or staining the mantel, do so now. Let it dry completely before adding any decorative elements.

Adding Your Personal Touch

Now comes the fun part! Decorate your new mantel! Add candles, plants, family photos – whatever reflects your personal style. You can even add some decorative molding or other details to further customize the look. The possibilities are endless!

Commonly Asked Questions

Q: What kind of wood is best for a fireplace mantel?

A: Hardwoods like oak, cherry, or walnut are durable and beautiful, but softer woods like pine are easier to work with for beginners. Choose a wood that matches your style and budget.

Q: How do I ensure my mantel is securely mounted?

A: Use sturdy support brackets and secure them to both the mantel and the wall using appropriate screws. Make sure the brackets are properly aligned and strong enough to support the weight of the mantel.

Q: Can I build a mantel without any woodworking experience?

A: Absolutely! Start with a simple design and take your time. There are plenty of resources available online to help guide you through the process. Don't be afraid to ask for help if you need it.

Q: What if I make a mistake?

A: Don't worry, everyone makes mistakes! Wood filler can fix a lot of minor imperfections. If you make a major mistake, you might need to start over, but don't let that discourage you. Learning from your mistakes is part of the process.

And there you have it! Your very own DIY fireplace mantel. Go forth and create something beautiful and unique for your home. Happy building!

Handmade Wooden Pie Safe Cabinets for Sale or DIY

Posted by myname with No comments

Handmade Wooden Pie Safe Cabinets: A Guide to Acquisition and Construction

The humble pie safe, a seemingly simple piece of kitchen furniture, holds a rich history and enduring appeal. These charming cabinets, traditionally crafted from wood, offer both practical storage and aesthetic charm. For those seeking to acquire or construct a handmade wooden pie safe, a careful consideration of various factors is crucial. This comprehensive guide explores the nuances of purchasing pre-made pie safes and provides a detailed overview of the DIY construction process, empowering enthusiasts to craft their own unique piece.

Acquiring a Handmade Wooden Pie Safe: A Buyer's Guide

The market for antique and handcrafted pie safes is vibrant, offering a range of styles, sizes, and conditions. Potential buyers should engage in thorough research and due diligence to ensure a wise investment.

Identifying Authentic and High-Quality Pieces

Authenticity is paramount. Examine the construction meticulously. Look for hand-hewn details, traditional joinery techniques (such as mortise and tenon joints), and the use of period-appropriate wood species. Signs of age and wear, while potentially detracting from pristine condition, often contribute to the character and value of an antique pie safe. Research common construction methods and styles prevalent during different eras to better understand the piece's potential origin and age. Reputable antique dealers and auction houses can provide valuable expertise and provenance documentation.

Assessing Condition and Value

Beyond authenticity, the condition of the pie safe directly impacts its value and functionality. Inspect for cracks, warping, insect infestation (evidence of woodworm or other pests), loose joints, and significant damage to the wood or hardware. Assess the integrity of the tin liners (if present), as these are crucial for the pie safe's primary function of protecting baked goods. A professional appraisal can be beneficial in determining the fair market value, especially for high-value pieces. Consider the presence of original paint, hardware, and any unique features that could enhance the value.

Navigating the Market: Sources and Pricing

Several avenues exist for acquiring a handmade wooden pie safe. Antique shops, flea markets, online auction sites, and estate sales are common sources. Prices vary dramatically depending on age, condition, style, wood type, and provenance. Antique pie safes in excellent condition can command significant prices, while those requiring restoration may be more affordable but necessitate additional investment in materials and labor. Careful comparison shopping and negotiation are crucial for securing a fair price.

Building Your Own Handmade Wooden Pie Safe: A DIY Approach

Constructing a pie safe is a challenging yet rewarding undertaking for skilled woodworkers. It requires precision, patience, and a thorough understanding of woodworking techniques.

Planning and Design Considerations

Before commencing construction, a detailed plan is essential. This includes choosing the dimensions, style, wood type, and finish. Consider the available space in your kitchen and the desired storage capacity. Detailed sketches or CAD drawings will be invaluable in visualizing the project and ensuring all components are properly sized and proportioned. Research various pie safe designs for inspiration, considering both historical accuracy and personal preferences. The choice of wood is significant, with hardwoods like oak, cherry, or maple offering durability and a pleasing aesthetic.

Materials and Tools

Gathering the necessary materials is crucial. This includes the selected wood (lumber should be appropriately dried and planed), hinges, latches, tin liners (if desired), wood screws, wood glue, sanding supplies, and finishing materials (stain, varnish, or paint). The required tools will vary depending on your skillset and the complexity of the design but generally include a table saw, miter saw, planer, jointer, router, chisels, hand saws, clamps, drill, and various sanding tools. Safety equipment, such as eye protection, dust masks, and hearing protection, is essential throughout the process.

Step-by-Step Construction Guide

The construction process can be broken down into several key stages:

  1. Cutting and Shaping the Wood: Precisely cut the lumber according to the plan. This involves careful measurements and the use of appropriate cutting tools to achieve straight, accurate cuts. Shape and smooth all components using planers, jointers, and sanding tools.
  2. Joinery: Assemble the cabinet frame using strong, durable joinery techniques like mortise and tenon, dovetail, or biscuit joints. Precise joinery ensures the structural integrity of the pie safe.
  3. Door Construction: Construct the door, ensuring it fits snugly within the frame. Incorporate decorative elements such as raised panels or molding if desired.
  4. Installing the Tin Liners (optional): If using tin liners, carefully measure and cut the tin to fit the interior of the cabinet. Secure the tin to prevent warping or damage.
  5. Hardware Installation: Attach the hinges, latches, and any other desired hardware. Ensure that all hardware functions smoothly and securely.
  6. Finishing: Apply a suitable finish to protect the wood and enhance its appearance. This could involve staining, varnishing, or painting, depending on personal preference and the overall design aesthetic. Multiple coats may be necessary for optimal protection and a smooth, even finish.

Troubleshooting and Refinement

During construction, expect to encounter challenges. Precise measurements and careful execution are crucial to minimize errors. If problems arise, consult woodworking resources, seek advice from experienced woodworkers, or consider using alternative joinery or construction techniques. The final stages often involve refinement and adjustments to ensure a smooth, functional, and aesthetically pleasing finished product.

Conclusion: A Legacy of Craftsmanship

Whether acquired or crafted, a handmade wooden pie safe represents a tangible connection to history and craftsmanship. The process of acquiring a pre-made piece allows for the appreciation of traditional techniques and the unique character of antique furniture. The DIY approach provides a rewarding opportunity for creative expression and the development of woodworking skills. Regardless of the chosen path, the resulting pie safe serves not only as a practical storage solution but as a beautiful and enduring piece of functional art.

Step-by-Step DIY Wooden Cutting Board Plans for a Stylish Kitchen

Posted by myname with No comments

Craft Your Dream Cutting Board: A DIY Guide for a Stylish Kitchen

Hey there, fellow kitchen enthusiasts! Are you tired of those boring, mass-produced cutting boards? Do you crave a beautiful, handcrafted piece that's as unique as your culinary style? Well, grab your tools and let's dive into this step-by-step guide on building your own stylish wooden cutting board! This isn't some super-complicated carpentry project; even if you're a beginner, you can totally do this. I promise.

Choosing Your Wood: The Heart of Your Cutting Board

The first step, and arguably the most fun, is picking out your wood. This is where you get to inject some personality into your project. Different woods offer different looks and functionalities. Here's a quick rundown:

Popular Choices:

  • Hard Maple: A classic choice. It's durable, light-colored, and relatively inexpensive. It's a great option for beginners.
  • Walnut: Rich, dark tones and beautiful grain patterns make walnut a stunning choice, though it's a bit pricier.
  • Cherry: Similar to maple in durability, cherry boasts warm reddish-brown tones that deepen over time, adding character.
  • Hardwood end-grain boards: These are made by joining together small hardwood blocks end-grain, meaning the wood is chopped up and then arranged, creating a very durable cutting board that is less prone to damage from knives.

Important Note: Avoid softwoods like pine or fir. They're too soft and will get gouged easily.

When selecting your wood, check for knots, cracks, or other imperfections. While some character is nice, avoid pieces with significant flaws that could compromise the board's strength and longevity.

Gathering Your Tools and Materials: Prep Work is Key

Before we even think about sawing, let's make sure we have everything we need. This will save you a lot of frustration later on.

Essential Tools:

  • Measuring Tape and Pencil: For accurate measurements and marking.
  • Circular Saw or Hand Saw: To cut the wood to size. A jigsaw works well too.
  • Safety Glasses and Dust Mask: Protect your eyes and lungs from flying debris.
  • Hand Plane or Electric Planer: To smooth out any rough edges (optional, but recommended).
  • Sandpaper (various grits): Starting with coarser grit (like 80) and finishing with finer grit (like 220) for a silky smooth surface.
  • Wood Glue (water-resistant): To ensure a strong bond if you're using multiple pieces of wood.
  • Clamps: To hold the pieces together while the glue dries.
  • Finishing Oil (mineral oil, food-grade cutting board oil): To protect and seal the wood.
  • Rags or Paper Towels: For applying the oil.

Materials:

  • Wood of your choice: Make sure it's properly dried and the right dimensions for your desired cutting board size.

Building Your Cutting Board: Let's Get Our Hands Dirty

Okay, now for the exciting part! Let's construct that beautiful cutting board.

Step 1: Cutting and Shaping

Measure and cut your wood to the desired dimensions. Remember to account for any desired handles or curves. Use a straight edge and a sharp saw for clean, accurate cuts. If using multiple pieces of wood to make the board thicker, apply wood glue to the edges of one piece of wood and then carefully place the other piece of wood on top. Then clamp them tightly to hold the wood until the glue is dried.

Step 2: Planing and Sanding

Once your pieces are cut and glued (if applicable), it's time to refine the surface. Use a hand plane or electric planer to smooth out any uneven surfaces. This step is all about getting the surfaces as smooth as possible. Now, carefully begin sanding. Start with a coarser grit sandpaper and gradually work your way up to finer grits. This process removes any imperfections and creates a wonderfully smooth surface.

Step 3: Finishing Touches

After you're completely satisfied with the smoothness of your cutting board, it's time for the finishing touches. Apply a generous coat of food-grade cutting board oil (mineral oil is also a popular choice) using a rag. Allow the oil to soak in for about 15-20 minutes, then wipe away any excess. Let it dry completely before applying another coat (at least 2-3 coats). The oil seals the wood, protecting it from moisture and making it more resistant to bacteria. This will also bring out the natural beauty of your wood.

Step 4: Adding Handles (Optional)

If you'd like to add handles to your cutting board, you can attach small pieces of wood using the same method you used to join multiple pieces of wood earlier. Then you can sand them down to create a comfortable grip.

Caring for Your Handcrafted Cutting Board: Keeping it Beautiful

With a little care, your handcrafted cutting board will last for years to come. Here are a few tips:

  • Hand-wash only: Avoid putting it in the dishwasher, as the heat and harsh detergents can damage the wood.
  • Oil regularly: Reapply a coat of food-grade oil every few months, or whenever the wood starts to feel dry.
  • Avoid prolonged water exposure: Don't let your cutting board sit in water for an extended period.
  • Use a cutting board scraper regularly to remove debris from the surface of the board.

Frequently Asked Questions (FAQ)

Q: What type of oil is best for cutting boards?

A: Food-grade mineral oil or a dedicated cutting board oil are excellent choices. Avoid using olive oil or other oils that can go rancid.

Q: How long does it take for the oil to dry?

A: It depends on the wood and the number of coats you apply, but each coat usually takes several hours to dry completely.

Q: Can I use this cutting board for meat?

A: Yes, but always remember to wash it thoroughly with hot soapy water after cutting meat. This will prevent cross-contamination.

Q: What if my cutting board gets a crack?

A: Small cracks are usually not a major problem. You can try to repair them with wood glue, but if the damage is extensive, it might be time to make a new one!

Q: Can I stain my cutting board?

A: While you can stain it, it is generally not recommended. Stains can affect food safety and won't be as durable as an oil finish. Stick to oil finishes for the best protection and food safety.

And there you have it! Your very own, stunning, handcrafted cutting board. Enjoy the process, be patient with yourself, and most importantly, have fun! Now get out there and create something beautiful for your kitchen!

How to Build a Sturdy Wooden Pergola for Your Garden

Posted by myname with No comments

Building Your Dream Garden Pergola: A Step-by-Step Guide

Hey there, fellow garden enthusiasts! So, you're thinking about building a pergola? Fantastic! A pergola adds so much charm and functionality to a garden, providing shade, a climbing spot for your plants, and a beautiful focal point. But where do you even start? Don't worry, I'm here to walk you through building a sturdy, beautiful pergola, step by step. We'll cover everything from planning and materials to construction and finishing touches. Let's get started!

Planning Your Pergola Paradise

Before you even think about grabbing a saw, take some time to plan your pergola. This crucial step will save you headaches and potential rework down the line. Think about these key factors:

1. Location, Location, Location!

Where will your pergola live? Consider sunlight, proximity to your house (for easier access to power, if needed), existing landscaping, and the overall aesthetic of your garden. You want it to be a beautiful addition, not an afterthought!

2. Size and Dimensions

How big do you want your pergola? Consider the space you have available and how you intend to use it. A small pergola might be perfect for a cozy seating area, while a larger one could accommodate a dining table and chairs. Sketch out a few different designs to visualize your options.

3. Style and Design

Pergolas come in all shapes and sizes! Do you envision a classic, rustic look? Or something more modern and minimalist? Think about the overall style of your house and garden to ensure a cohesive design. Browse online for inspiration – Pinterest is a goldmine!

4. Materials

The most common material for pergolas is pressure-treated lumber, which is naturally resistant to rot and insects. However, cedar and redwood are also excellent choices, offering a beautiful natural look and durability. Consider your budget and the aesthetic you're aiming for when making your choice. Don't forget about fasteners – you'll need plenty of galvanized or stainless steel screws to ensure longevity.

Gathering Your Supplies: A Pergola Shopping List

Once you've finalized your design, it's time to gather your supplies. This list is a guideline; you'll need to adjust it based on your specific pergola dimensions:

  • Pressure-treated lumber (or cedar/redwood): 4x4 posts, 2x4 beams, and 2x4 rafters.
  • Concrete mix: For setting the posts firmly in the ground.
  • Post hole digger or auger: To dig holes for the posts.
  • Level: Essential for ensuring your pergola is perfectly plumb.
  • Measuring tape and pencil: For accurate measurements and marking.
  • Circular saw or hand saw: To cut the lumber to size.
  • Drill and drill bits: For pilot holes and screwing.
  • Screws: Galvanized or stainless steel, appropriate for the wood type.
  • Post base anchors (optional): For added stability.
  • Wood stain or sealant: To protect the wood from the elements.
  • Safety glasses and work gloves: Always prioritize safety!

Building Your Pergola: A Step-by-Step Guide

Alright, let's get building! Remember to always prioritize safety. Wear safety glasses and work gloves throughout the entire process.

1. Setting the Posts

Dig holes for your posts, ensuring they're deep enough (at least 2-3 feet) and spaced according to your design. Add gravel to the bottom of each hole for drainage. Set the posts in the holes, ensuring they're plumb (perfectly vertical) using a level. Fill the holes with concrete mix, allowing it to cure completely before proceeding.

2. Attaching the Beams

Once the concrete is set, it's time to attach the beams to the posts. Use the appropriate-sized screws, pre-drilling pilot holes to prevent splitting the wood. Ensure the beams are level and securely fastened.

3. Attaching the Rafters

Now, attach the rafters to the beams. Space them evenly, creating a lattice effect. Again, use pre-drilled pilot holes and ensure they're securely fastened. You can create a more intricate design by adding cross-bracing for extra stability.

Finishing Touches: Making it Your Own

Once the structure is complete, it's time to add your personal touch! Consider these options:

  • Stain or sealant: Apply a wood stain or sealant to protect the wood from the elements and enhance its natural beauty. Choose a color that complements your garden's aesthetic.
  • Climbing plants: Train climbing plants like wisteria, clematis, or jasmine to grow over the pergola, creating a lush, shaded canopy.
  • Lighting: Add string lights or solar-powered path lights to create a magical ambiance in the evening.
  • Furniture: Choose comfortable outdoor furniture to complete your relaxing oasis.

Commonly Asked Questions

Here are some questions I often get asked about building pergolas:

  • Q: How long does it take to build a pergola? A: The time it takes depends on the size and complexity of your design. A simple pergola can be built in a weekend, while a more elaborate one might take several days.
  • Q: Do I need a permit to build a pergola? A: This depends on your local building codes. Check with your local authorities to determine if a permit is required.
  • Q: How do I prevent rot and insect damage? A: Use pressure-treated lumber, or cedar/redwood. Apply a high-quality wood stain or sealant to protect the wood from the elements.
  • Q: Can I build a pergola myself, or should I hire a professional? A: Many DIYers successfully build pergolas. However, if you're not comfortable with woodworking or construction, hiring a professional is a good option.
  • Q: What's the best type of wood for a pergola? A: Pressure-treated lumber is a popular and affordable choice. Cedar and redwood are also excellent options, offering durability and a beautiful natural look.

Building a pergola is a rewarding project that will enhance your garden for years to come. Remember to take your time, plan carefully, and enjoy the process! Happy building!

Buy Custom Wooden Pepper Mills or Make Your Own

Posted by myname with No comments

The Acquisition or Fabrication of Bespoke Wooden Pepper Mills: A Comprehensive Analysis

The humble pepper mill, a seemingly simple kitchen utensil, can elevate the culinary experience from mundane to magnificent. The satisfying grind, the aromatic release of freshly cracked peppercorns, transforms a dish from ordinary to extraordinary. For the discerning cook, the choice between purchasing a custom-made wooden pepper mill and undertaking the project of crafting one's own presents a significant deliberation, demanding careful consideration of several key factors.

The Allure of Custom-Made Wooden Pepper Mills

The market offers an array of pre-made wooden pepper mills, each boasting unique aesthetic qualities and functional attributes. However, the appeal of a truly bespoke pepper mill lies in its unparalleled personalization. A custom-made piece allows the individual to dictate every aspect of the final product, from the selection of wood species to the design of the mechanism and handle.

Advantages of Purchasing a Custom Mill

Choosing a custom-made pepper mill from a skilled artisan presents a multitude of advantages. Firstly, quality is paramount. Artisans typically utilize high-quality wood, ensuring durability and longevity far exceeding mass-produced alternatives. The craftsmanship is meticulous, resulting in a visually stunning and functionally superior instrument. Secondly, personalization is limitless. The customer can specify the desired wood type (e.g., cherry, walnut, maple, olive wood), the finish (e.g., polished, oiled, lacquered), the size and shape of the mill, and the type of grinding mechanism. This allows for the creation of a unique piece that seamlessly integrates with the individual's kitchen aesthetic and personal preferences.

Disadvantages of Purchasing a Custom Mill

While custom-made mills offer unparalleled quality and personalization, they come with inherent drawbacks. Cost is a significant factor. The labour-intensive nature of crafting a bespoke pepper mill translates to a higher price point than mass-produced alternatives. Furthermore, lead times can be considerable. Artisans often operate on a waiting list, necessitating advance planning and patience. Finally, availability can be limited. The number of skilled artisans specializing in crafting wooden pepper mills might be restricted, depending on geographical location.

The Art and Craft of Making Your Own Wooden Pepper Mill

Alternatively, the prospect of crafting a pepper mill from scratch appeals to individuals with a penchant for woodworking and a desire for a uniquely personal creation. This approach, while demanding time, skill, and resources, rewards the maker with a profound sense of accomplishment and a truly one-of-a-kind kitchen accessory.

Necessary Skills and Tools

Undertaking this project necessitates a certain level of woodworking expertise. Familiarity with tools such as hand planes, chisels, saws (hand and power), drills, and sanding equipment is essential. Precision and patience are paramount throughout the process. Furthermore, a working knowledge of wood turning, if choosing a turned design, is advantageous. Access to a well-equipped workshop, or at minimum, a suitable workspace with adequate ventilation, is crucial for a safe and effective undertaking.

Choosing Materials: Wood Selection and Grinding Mechanisms

Selecting appropriate materials is a critical step. Hardwoods such as cherry, walnut, maple, or oak are ideal choices, offering durability and aesthetic appeal. Softer woods are less suitable due to their susceptibility to wear and tear. The grinding mechanism is equally important. Several options exist, including pre-made mechanisms readily available from specialist suppliers or the option of crafting a bespoke mechanism from scratch, a challenging endeavour requiring advanced mechanical skills and specialized tools. Careful consideration of the grain direction of the wood is necessary to maximize the strength and longevity of the finished mill.

The Construction Process: A Step-by-Step Outline

The construction process involves several distinct steps, each demanding meticulous attention to detail. These may include:

  • Design and Planning: Creating detailed drawings and selecting appropriate dimensions are essential for a successful outcome.
  • Wood Preparation: This involves selecting, drying, and cutting the wood to the required dimensions.
  • Shaping and Carving: Using hand tools or power tools to shape the body and handle of the pepper mill according to the chosen design.
  • Grinding Mechanism Integration: Precisely fitting and securing the chosen grinding mechanism within the mill body.
  • Finishing: Sanding the wood to a smooth finish, followed by applying a suitable oil or varnish to protect the wood and enhance its appearance.

Advantages of Crafting Your Own Mill

Crafting a pepper mill from scratch offers significant advantages. The foremost advantage is the unparalleled personalization it allows. Every aspect of the mill, from its shape and size to its finish and materials, is entirely under the control of the maker. This results in a truly unique and personal creation reflecting the maker's skills and aesthetic preferences. Secondly, the process provides a rewarding learning experience, enhancing woodworking skills and fostering a deeper appreciation for craftsmanship. Finally, while initially requiring a greater investment in time and resources, the cost per unit can be potentially lower, particularly for individuals with access to affordable materials and tools.

Disadvantages of Crafting Your Own Mill

The undertaking is not without its drawbacks. Time commitment is significant, with the project potentially spanning several weeks or even months depending on the complexity of the design and the maker's skill level. The financial investment in tools and materials can be substantial, especially for those lacking the necessary equipment. Furthermore, the risk of errors is present. Improper technique can lead to damage to the materials or a functionally inferior product. Finally, learning curve associated with woodworking can be steep for beginners, potentially leading to frustration and disappointing results.

Conclusion: A Matter of Personal Preference

Ultimately, the decision of whether to buy a custom-made wooden pepper mill or to craft one's own hinges upon individual circumstances and preferences. Those prioritizing convenience, superior quality, and a readily available product should opt for purchasing a custom-made mill from a skilled artisan. However, those seeking a personally rewarding creative outlet, willing to invest the necessary time and effort, and possessing the requisite skills should find the prospect of crafting their own pepper mill immensely fulfilling. Regardless of the chosen path, the resulting pepper mill will serve as a testament to the appreciation of fine craftsmanship and the pursuit of culinary excellence.

DIY Wooden Farmshop Plans for a Functional Work Space

Posted by myname with No comments

Build Your Dream DIY Wooden Farmshop: A Comprehensive Guide

Tired of cramped, cluttered workspaces? Dream of a functional, aesthetically pleasing area dedicated to your projects? Building your own DIY wooden farmshop is the perfect solution! This comprehensive guide walks you through the process, from initial design to the final touches, empowering you to create a workspace tailored to your specific needs and style. We'll explore planning, material selection, construction techniques, and finishing touches, ensuring your farmshop becomes the heart of your creative endeavors.

Planning Your Farmshop: Size, Layout, and Features

Before grabbing your tools, meticulous planning is crucial. First, determine the ideal size for your farmshop. Consider the tools you'll be using, the projects you'll undertake, and available space. A detailed floor plan, sketched on paper or using design software, helps visualize the layout. Include designated areas for woodworking, storage, and potentially even a small office space. Think about workflow—how will you move materials and tools efficiently? Consider incorporating features like ample workbenches, integrated storage solutions (shelving, drawers, pegboards), and appropriate lighting.

Essential Features to Consider:

  • Workbench Design: Choose a design that suits your needs, considering features like built-in vises, drawers, and ample surface area.
  • Storage Solutions: Plan for robust storage to keep tools and materials organized and easily accessible. Consider cabinets, drawers, and shelving.
  • Electrical Outlets & Lighting: Strategically place electrical outlets and consider the type and placement of lighting (overhead, task lighting) for optimal visibility.
  • Ventilation: Proper ventilation is vital, especially for woodworking, to remove dust and fumes. Consider installing a dedicated ventilation system or strategically placed windows.

Material Selection: Choosing the Right Wood for Your Farmshop

The choice of wood significantly impacts your farmshop's durability, aesthetics, and overall cost. Pressure-treated lumber provides excellent resistance to rot and insects, ideal for the foundation and any exterior elements. For the framework and interior elements, consider durable hardwoods like oak or maple for their strength and longevity. Softwoods like pine or fir are more affordable but might require additional treatment for durability. Remember to factor in the cost and availability of your chosen materials when making your selection. Consider purchasing wood in bulk to potentially save money and ensure consistent color and grain.

Construction: Building Your DIY Wooden Farmshop

With your plans finalized and materials gathered, construction begins! Start by building the foundation, ensuring it's level and stable. Erect the framework, paying close attention to squareness and plumbness for structural integrity. Install wall sheathing and consider adding insulation for better temperature control. Construct the roof, ensuring proper drainage and weather protection. Finally, install the doors and windows, completing the farmshop's shell. Remember to consult building codes and obtain any necessary permits before beginning construction.

Key Construction Steps:

  • Foundation: Lay a concrete slab or use pressure-treated lumber for a stable base.
  • Framing: Construct a sturdy frame using pressure-treated lumber or durable hardwood.
  • Sheathing & Insulation: Install wall sheathing and consider adding insulation for energy efficiency.
  • Roofing: Construct a durable roof that effectively sheds water and protects against the elements.
  • Finishing Touches: Install doors, windows, and any remaining interior features.

Finishing Touches: Personalizing Your Farmshop

Once the structure is complete, personalize your farmshop! Apply a protective finish to the wood, like a sealant or stain, enhancing its durability and aesthetics. Install your workbenches, storage solutions, and lighting fixtures. Adding organizational tools like pegboards and hooks further enhances functionality. Consider incorporating personal touches, like displaying your favorite tools or artwork, transforming your farmshop into a truly inspiring workspace. Remember that this is your space; personalize it to reflect your style and needs, fostering creativity and productivity.

How to Build a Wooden Garden Lounge Chair for Ultimate Relaxation

Posted by myname with No comments

Constructing a Luxurious Wooden Garden Lounge Chair for Unparalleled Relaxation

This comprehensive guide details the process of crafting a bespoke wooden garden lounge chair designed for optimal comfort and aesthetic appeal. The project requires intermediate woodworking skills and access to appropriate tools. While detailed instructions are provided, individual adjustments may be necessary based on personal preferences and available materials.

I. Planning and Design

A. Material Selection:

The choice of wood significantly impacts the chair's durability, aesthetic, and maintenance requirements. Hardwoods such as teak, cedar, or redwood are ideal for outdoor applications due to their natural resistance to rot and decay. However, these options can be expensive. Pressure-treated softwoods, like pine or fir, offer a more budget-friendly alternative, providing adequate durability when properly sealed. Consider the following factors when selecting your lumber:

  • Durability: Resistance to rot, insect infestation, and weathering.
  • Aesthetics: Grain pattern, color, and overall appearance.
  • Cost: Balance between desired quality and budget constraints.
  • Workability: Ease of cutting, shaping, and finishing.

Ensure the lumber is properly dried to prevent warping and cracking after construction. The recommended moisture content is typically below 12%.

B. Design Considerations:

Before commencing construction, meticulously plan the chair's dimensions and design. Consider the following:

  • Overall Size: Determine the chair's height, width, and depth to ensure comfortable seating for your intended users.
  • Seat Height: A comfortable seat height generally ranges from 16 to 18 inches.
  • Backrest Angle: An ergonomically sound backrest angle is crucial for comfort and posture support. Aim for a slight recline of approximately 100-110 degrees.
  • Armrests: Incorporate armrests for added support and comfort, ensuring they are positioned at a suitable height and width.
  • Style: Choose a design that complements your garden's existing aesthetic. Consider traditional styles, contemporary designs, or a blend of both.

Creating detailed sketches or utilizing computer-aided design (CAD) software can be highly beneficial in visualizing the final product and ensuring precise measurements.

II. Material Preparation and Cutting

Once the design is finalized, prepare the lumber according to the dimensions specified in your plans. Accuracy at this stage is paramount to ensure a well-fitting and structurally sound chair.

A. Cutting the Lumber:

Using a miter saw or circular saw, carefully cut the lumber to the exact dimensions outlined in your design. Ensure clean, precise cuts to minimize the need for extensive sanding later in the process. Accurate cuts are crucial for the structural integrity of the chair. Consider using a guide to ensure straight cuts, especially for longer pieces.

B. Sanding:

After cutting, meticulously sand all lumber pieces to remove any splinters or rough edges. Start with coarser grit sandpaper (around 80-100 grit) and gradually progress to finer grits (120-180 grit) to achieve a smooth surface. Proper sanding prevents splinters and ensures a comfortable, smooth finish.

III. Assembly

This section outlines the assembly process. The specific steps may vary slightly depending on the chosen design, but the general principles remain consistent. Always pre-drill pilot holes before driving screws to prevent wood splitting.

A. Constructing the Frame:

Begin by assembling the chair's main frame, which typically consists of the seat supports, leg supports, and backrest supports. Utilize appropriate joinery techniques, such as mortise and tenon joints or robust dado joints, for strength and stability. Alternatively, strong wood glue and screws can be employed for simpler designs. Ensure all joints are securely fastened and aligned correctly.

B. Attaching the Seat:

Once the frame is complete, attach the seat slats or panels. For added comfort, consider using wider slats with slight spacing between them for better air circulation. Alternatively, a solid wood panel can be used for a more traditional look. Ensure the seat is firmly attached and level.

C. Attaching the Backrest:

Secure the backrest supports to the frame, maintaining the desired angle for optimal comfort and back support. The backrest slats or panels should be attached in a similar manner to the seat, ensuring secure and even spacing. Consider adding a slight curve to the backrest for ergonomic support.

D. Adding Armrests (Optional):

If incorporating armrests, carefully attach them to the frame at a comfortable height and width. Ensure the armrests are securely fastened and appropriately positioned for user comfort. The armrests can be attached using screws, dowels, or a combination of both.

IV. Finishing

The finishing process protects the wood from the elements and enhances its aesthetic appeal. This is a crucial step for outdoor furniture to ensure longevity and beauty.

A. Applying Wood Sealer or Primer:

Before applying the final finish, apply a wood sealer or primer to prevent moisture absorption and enhance paint or stain adhesion. Allow adequate drying time as recommended by the manufacturer.

B. Applying Stain or Paint:

Apply a high-quality exterior-grade stain or paint to protect the wood from UV rays, moisture, and insects. Multiple thin coats are preferable to one thick coat to avoid drips and ensure even coverage. Allow ample drying time between coats according to the manufacturer's instructions.

C. Applying a Topcoat (Optional):

Consider applying a clear topcoat, such as polyurethane or varnish, to further protect the finish and enhance its durability. This provides an additional layer of protection against weathering and wear. Again, apply multiple thin coats for optimal results.

V. Inspection and Refinement

Before declaring the project complete, conduct a thorough inspection of the finished chair. Check for any loose screws, uneven joints, or areas requiring further sanding or finishing. Address any imperfections to ensure a high-quality, durable, and comfortable garden lounge chair. Regular maintenance, including cleaning and re-application of protective finishes, will extend the life of your handcrafted chair, ensuring many years of relaxation and enjoyment.

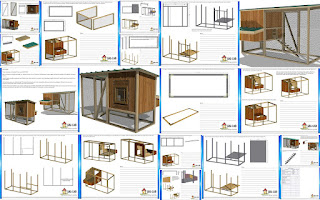
Best DIY Chicken House Plans for a Safe and Functional Coop

Posted by myname with No comments

Best DIY Chicken House Plans for a Safe and Functional Coop

Building your own chicken coop can be a rewarding experience, offering both cost savings and the satisfaction of creating a perfect home for your feathered friends. But navigating the world of DIY chicken coop plans can feel overwhelming. This guide provides detailed information to help you design and build a safe, functional, and aesthetically pleasing coop that your chickens will love.

Essential Design Considerations for Your DIY Chicken Coop

Before you even think about hammering a nail, carefully consider the following aspects of your coop design. These elements directly impact your chickens' health, safety, and overall well-being. Failing to address them properly could lead to unhappy hens and a frustrating experience for you.

Size and Space Requirements

Space is paramount. Cramped quarters lead to stress, pecking order disputes, and increased risk of disease. A general rule of thumb is to allow at least 4 square feet of floor space per chicken in the coop itself, plus additional outdoor run space. Consider the size of your flock and plan accordingly. A larger coop allows for easier cleaning and management, reducing the workload for you.

Ventilation and Climate Control

Proper ventilation is crucial for maintaining a healthy coop environment. Poor airflow can lead to a buildup of ammonia, dust, and moisture, creating a breeding ground for disease. Incorporate vents strategically, ensuring airflow without creating drafts. Consider the climate – in hotter climates, you'll need extra ventilation to prevent overheating; in colder climates, focus on insulation and wind protection.

Predator Protection

Protecting your flock from predators is non-negotiable. Weasels, foxes, raccoons, and even larger birds can wreak havoc on your flock. Build a sturdy coop with predator-proof features. This includes using hardware cloth (not chicken wire) for all openings, burying the wire several inches below ground to prevent digging, and securing the coop's foundation securely.

Choosing the Right DIY Chicken Coop Plan

Numerous DIY chicken coop plans are available online and in books, ranging from simple designs to elaborate structures. Select a plan that aligns with your skill level, budget, and the size of your flock. Consider these factors:

Simple vs. Complex Designs

Beginner-friendly plans often feature simple rectangular structures, easily constructed using readily available materials. More complex plans may incorporate unique features such as nesting boxes built into the walls or multiple levels. Choose a design you feel confident building.

Material Selection

Common materials include wood, plywood, and metal. Wood offers a natural aesthetic and good insulation, but requires regular maintenance. Plywood is a cost-effective option, while metal is durable but can be more challenging to work with. Consider the climate and your budget when selecting materials.

Accessibility and Cleaning

Ease of cleaning is essential for maintaining a healthy coop. Design your coop with easy-to-clean features. This includes removable perches, ample space for cleaning, and easily accessible nesting boxes. A hinged door on the front or a sliding door on the side is essential for easy access.

Constructing Your Dream Chicken Coop: A Step-by-Step Guide

Once you've selected a plan, carefully review the instructions. Gather all necessary tools and materials. Follow these general steps:

Foundation and Framing

Begin by building a sturdy foundation, either using concrete blocks or pressure-treated lumber. Then, construct the coop's frame using the dimensions specified in your plan. Ensure all joints are secure and level.

Walls and Roofing

Next, add the walls and roof. Remember to incorporate ventilation and secure predator-proofing measures. Choose roofing material that's weather-resistant and durable.

Interior Features

Finally, install the perches, nesting boxes, and any additional features specified in your plan. Ensure the placement of these features promotes comfort and easy cleaning.

Building your own chicken coop is a fun and rewarding project. By carefully considering design elements and following a detailed plan, you can create a safe, functional, and beautiful home for your chickens – a place where they will thrive for years to come.

Best DIY Wooden Picture Frame Kits for Beginners

Posted by myname with No comments

Unleash Your Inner Artisan: The Best DIY Wooden Picture Frame Kits for Beginners

Stepping into the world of crafting can feel daunting, but creating a beautiful, personalized picture frame is a fantastic starting point. Forget generic store-bought frames; DIY wooden picture frame kits offer a rewarding experience, allowing you to build something unique and charming with your own two hands. This guide highlights the best kits for beginners, ensuring a smooth and enjoyable crafting journey. We'll explore what to look for, and which kits offer the perfect blend of simplicity and high-quality materials.

Choosing the Right DIY Picture Frame Kit

Selecting your first DIY picture frame kit requires careful consideration. Beginners should prioritize kits with clear instructions, pre-cut wood components, and all necessary hardware included. Avoid kits that involve intricate joinery or require specialized tools you don't already own. Look for kits that explicitly state they're suitable for beginners. Pay attention to the wood type; softwoods like pine are generally easier to work with than hardwoods. Consider the style – a simple, minimalist frame offers a great starting point, allowing you to focus on the assembly process and avoid complex design elements.

Key Features to Look For:

  • Pre-cut wood pieces: This eliminates the need for precise measuring and cutting, a common challenge for beginners.
  • Detailed instructions with pictures: Clear, step-by-step instructions with accompanying images will guide you through the process seamlessly.
  • All necessary hardware included: Look for kits that provide everything you need, including screws, clamps (if required), and even sandpaper.
  • Softwood construction: Pine or fir are easier to work with than hardwoods, making assembly less challenging for beginners.
  • Simple design: Opt for a straightforward design to focus on mastering the assembly technique.

Top Recommended DIY Wooden Picture Frame Kits for Beginners

Several excellent kits cater specifically to beginners. While specific brands and availability can vary, the key features mentioned above should guide your selection. Look for kits that offer various sizes, allowing you to frame a cherished photo or artwork perfectly. Many online retailers and craft stores offer reviews, helping you make an informed decision. Don't hesitate to read reviews before purchasing to see what other beginners experienced with a particular kit.

Factors to Consider Beyond the Kit:

  • Your Skill Level: While these kits are designed for beginners, honestly assessing your DIY capabilities will ensure a positive experience.
  • Time Commitment: Allocate sufficient time for the project. Don't rush; take your time and enjoy the process.
  • Personalization: Once you've assembled your frame, consider personalizing it further. You can paint it, stain it, add decoupage, or even burn designs into the wood for a unique touch.

Beyond the Assembly: Personalizing Your Creation

Once you've successfully assembled your frame, the real fun begins! Personalization is where your creativity truly shines. A simple coat of paint can transform a plain wooden frame into a vibrant statement piece. Explore different staining techniques for a rustic or antique look. Consider adding embellishments like decorative metal corners or fabric accents. The possibilities are endless, making your DIY picture frame a unique and cherished keepsake.

Embarking on your first DIY project can be incredibly rewarding. With the right kit and a little patience, creating a stunning wooden picture frame is well within your reach. So grab your tools, gather your materials, and unleash your inner artisan!

Best Wooden Pie Safe Cabinet Kits for Easy Assembly

Posted by myname with No comments

A Comprehensive Guide to the Best Wooden Pie Safe Cabinet Kits for Easy Assembly

The allure of handcrafted furniture, particularly pieces imbued with historical significance like the pie safe, is undeniable. These charming cabinets, once essential for preserving baked goods, now serve as cherished decorative accents and functional storage solutions in modern kitchens and homes. However, constructing a pie safe from scratch can be a daunting task, requiring significant woodworking expertise and a considerable time investment. Fortunately, numerous companies offer meticulously crafted pie safe cabinet kits, providing an accessible route to owning this beautiful piece without the complexities of building it entirely from raw materials. This guide provides a detailed exploration of the factors to consider when selecting a pie safe kit and highlights some of the best options available for easy assembly.

Factors to Consider When Choosing a Pie Safe Cabinet Kit

Selecting the ideal pie safe cabinet kit requires careful consideration of several crucial factors. A well-informed decision ensures a satisfying assembly process and a finished product that meets your expectations both aesthetically and functionally.

Wood Type and Quality

The type of wood used significantly influences the pie safe's durability, appearance, and price. Popular choices include pine, oak, and cherry. Pine is generally more affordable and readily available, offering a lighter, brighter aesthetic. Oak is known for its strength and rich, classic appearance, making it a premium choice. Cherry boasts a luxurious look and exceptional durability, but often commands a higher price point. Assess your budget and desired aesthetic when selecting the wood type. Furthermore, examine the quality of the wood; look for straight grain, minimal knots, and consistent color. Reputable kit manufacturers will provide detailed information about the wood species and its quality.

Kit Components and Pre-Assembly

The level of pre-assembly included in the kit directly impacts the ease of construction. Some kits arrive with many components already pre-cut and partially assembled, reducing the time and skill needed for completion. Others offer more of a "from-scratch" experience, requiring greater woodworking expertise. Examine the kit's specifications carefully. Look for kits that offer pre-drilled holes, pre-cut mortises and tenons, and pre-finished components where possible. This minimizes the need for complex joinery and reduces the chance of errors.

Hardware and Finishing

The quality of the hardware—hinges, latches, and handles—significantly impacts the functionality and appearance of the finished pie safe. Look for robust, well-made hardware that complements the style of the cabinet. Consider whether the kit includes the necessary hardware or if it needs to be purchased separately. Similarly, assess the finishing options. Some kits may include pre-finished components or stain, while others require you to apply the finish yourself. Evaluate your skill level in finishing before making a selection.

Design and Dimensions

Pie safes come in various designs and sizes, ranging from small, compact models to larger, more elaborate pieces. Consider the available space in your kitchen or dining area before selecting a kit. Measure the intended location carefully to ensure the assembled pie safe fits comfortably. Think about the desired style—rustic, Shaker, Victorian, etc.—and choose a kit that aligns with your preferred aesthetic. Examine the available design details, such as the number of shelves, door styles, and ventilation features.

Manufacturer Reputation and Customer Reviews

Before purchasing a pie safe cabinet kit, research the manufacturer's reputation. Check online reviews and forums to gauge customer satisfaction with the kit's quality, ease of assembly, and customer service. Look for manufacturers with a proven track record of producing high-quality kits and providing excellent support to their customers. A reputable manufacturer will offer clear instructions, readily available customer support, and a warranty on their products.

Top Choices for Easy-to-Assemble Wooden Pie Safe Cabinet Kits

While specific product recommendations can change rapidly based on availability and manufacturer updates, we can offer a generalized overview of features to look for when selecting a kit focused on ease of assembly. Remember to always check current reviews and compare offerings from different vendors before committing to a purchase.

Key Features for Easy Assembly:

  • Pre-cut and pre-drilled components: Minimizes the need for intricate cutting and reduces the likelihood of errors.
  • Simple joinery techniques: Focus on techniques like dowel joints or butt joints that are easier to execute than more complex methods.
  • Clear and detailed instructions: Well-illustrated instructions with step-by-step guidance significantly improve the assembly process.
  • Pre-finished or easily applied finish: Pre-finished kits save time and effort. If finishing is required, opt for kits with straightforward finishing instructions and compatible stain or paint.
  • Quality hardware included: Ensures a smooth and trouble-free assembly process.
  • Examples of Features to Look For (Specific Brand Names Omitted to Remain General and Avoid Implicit Endorsement):

    When researching, look for kits that explicitly mention features such as "easy assembly," "pre-assembled components," or "simplified construction." Some manufacturers might even specify the estimated assembly time to help you compare options. Pay close attention to customer reviews that specifically discuss the assembly experience, noting any challenges or ease of construction.

    Conclusion

    Building a wooden pie safe can be a rewarding project. Choosing a well-designed kit significantly simplifies the process, making it accessible to individuals with varying levels of woodworking experience. By carefully considering the factors outlined above and researching available options, you can select a pie safe cabinet kit that ensures a smooth and enjoyable assembly experience, resulting in a beautiful and functional addition to your home. Remember to always prioritize quality materials, clear instructions, and a reputable manufacturer to maximize your chances of success.

    DIY Wooden Blanket and Storage Chest Plans for Home Organization

    Posted by myname with No comments

    DIY Wooden Blanket and Storage Chest Plans for Home Organization

    Hey there, fellow crafters and organization enthusiasts! Are you tired of those unsightly piles of blankets taking over your living room? Or maybe you're yearning for a beautiful, functional storage solution that actually *fits* your style? Well, grab your tools and let's build it! This guide will walk you through creating your own custom wooden blanket and storage chest – a piece that's both practical and a gorgeous addition to your home. It might sound intimidating, but trust me, with a little patience and these step-by-step instructions, you'll be amazed at what you can accomplish.

    Planning Your Perfect Chest

    Before diving into the sawdust and the satisfying *thunk* of the hammer, let's plan! This is where you get to personalize your project. Consider these factors:

    Size and Dimensions

    How much storage space do you need? Will this chest primarily house blankets, or will you be using it for other items like seasonal clothing or toys? Measure the area where the chest will live to ensure a proper fit. Don't be afraid to sketch out a few different designs – even a rough drawing on a napkin can be surprisingly helpful.

    Wood Type and Finish

    This is where you can get creative! Pine is a great affordable option, readily available at most home improvement stores. For a more rustic look, consider using reclaimed wood. If you're aiming for a more elegant finish, hardwoods like oak or cherry are beautiful choices (though they come with a slightly higher price tag). Think about the overall style of your home and choose a wood type that complements it. And don't forget about the finish! A simple stain and varnish will protect the wood and enhance its natural beauty. You could also opt for a painted finish for a more vibrant, personalized touch.

    Hardware

    Handles, hinges, and latches are the finishing touches that will add character to your chest. Browse online or visit your local hardware store to find options that complement your chosen wood and finish. Consider the style – rustic, modern, minimalist – and choose hardware that reflects your aesthetic.

    Gathering Your Supplies

    Now for the fun part – shopping! Here's a list of materials you'll need. Remember that quantities will vary depending on the size of your chest. It's always better to have a little extra than to run short mid-project!

    • Wood: Your chosen wood type, cut to the dimensions you've planned (check the next section for a sample plan). Remember to account for the thickness of the wood when calculating dimensions.
    • Wood Glue: A strong wood glue is crucial for a durable chest.
    • Screws: Various sizes depending on the wood thickness and the hardware you're using.
    • Sandpaper: Different grits for smoothing the wood – start with a coarser grit and work your way to finer grits for a smooth, professional finish.
    • Wood Finish: Stain, varnish, or paint – your choice!
    • Hardware: Handles, hinges, and a latch.
    • Clamps: To hold the wood pieces together while the glue dries.
    • Measuring Tape and Pencil: Essential for accurate cuts and measurements.
    • Safety Glasses and Dust Mask: Always prioritize safety!
    • Saw (Circular Saw or Miter Saw): For cutting the wood to size. A jigsaw might be handy for curved cuts.
    • Drill and Drill Bits: For creating pilot holes before screwing in the hardware.
    • Screwdriver: For fastening screws.

    Building Your Blanket Chest: A Sample Plan

    Let's assume you want to build a chest that's approximately 36 inches wide, 24 inches deep, and 18 inches high. This is just a sample; adjust these dimensions to fit your needs. This is a basic construction, you can certainly modify it with more intricate details and features!

    Cutting Your Wood

    You'll need the following pieces:

    • Two side pieces: 18" x 24"
    • Two end pieces: 18" x 36"
    • One bottom piece: 24" x 36"
    • One top piece: 24" x 36" (or slightly smaller to allow for a lid)
    • Optional: Internal dividers or shelves to customize your storage.

    Assembly

    1. Apply wood glue to the edges of the bottom piece and side pieces, then clamp them together to form the base. Use screws to reinforce the joints.

    2. Attach the end pieces to the base, using wood glue and screws.

    3. Attach the top piece using hinges. Ensure that the lid is flush with the top and fits well.

    4. Install your chosen handles and latch.

    5. Sand all surfaces thoroughly, starting with coarser grits and moving to finer grits for a smooth finish.

    6. Apply your chosen wood finish. Allow ample drying time between coats.

    Finishing Touches and Customization

    Once the chest is assembled and finished, it's time for the fun part – adding those personal touches! Consider these options:

    • Decorative hardware: Upgrade your basic handles with something more unique and stylish.
    • Custom stenciling or painting: Add a personalized design or quote to make the chest truly your own.
    • Adding feet: Raise the chest slightly off the ground using small wooden feet or casters for a more sophisticated look and easier cleaning.
    • Internal organization: Install dividers or shelves to keep your blankets and other items neatly organized.

    Frequently Asked Questions

    Q: What type of wood is best for a blanket chest?
    A: Pine is a great affordable option, but hardwoods like oak or cherry offer more durability and a more elegant look.

    Q: How do I ensure the lid fits properly?
    A: Measure carefully and make sure the top piece is slightly smaller than the body to allow for a snug fit. Use hinges that are appropriate for the size and weight of the lid.

    Q: What if I don't have all the tools listed?
    A: Many home improvement stores offer tool rental services. You can also consider asking a friend or neighbor for help, or exploring local woodworking workshops.

    Q: How long does the project take?
    A: The time required will vary based on your experience level and the complexity of your design. Expect to dedicate several hours over a few days to complete the project.

    Q: Can I stain the wood after assembling the chest?
    A: Yes, but ensure you sand thoroughly to create a smooth surface for even stain application.

    There you have it! With a little planning and effort, you can build a beautiful and functional blanket and storage chest that will enhance your home organization and add a touch of handcrafted charm. Happy building!