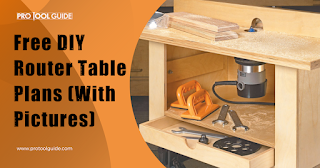
DIY Compact Woodworking Table for Small Spaces – Free Guide
Constructing a dedicated woodworking table in a small space presents unique challenges. This comprehensive guide provides detailed instructions for building a compact yet functional woodworking table, ideal for apartments, garages with limited space, or workshops where maximizing space is paramount. The design emphasizes efficiency and incorporates features that mitigate the limitations of a smaller footprint.
Planning and Design Considerations
Before commencing construction, meticulous planning is crucial. The dimensions of the table should be carefully considered, balancing functionality with available space. Measure the area where the table will be located to determine the maximum feasible dimensions. Consider the types of woodworking projects you intend to undertake, as this will influence the table's design and features.
Determining Dimensions and Material Selection
A compact woodworking table could range from 30 inches to 48 inches in width and 24 inches to 36 inches in depth. Height is typically 34 inches to 36 inches, accommodating comfortable posture while working. The choice of materials is also critical. Hardwoods such as maple, oak, or cherry offer superior durability and resistance to wear, but are more expensive. Softer woods like pine or fir are more economical but may require more maintenance and exhibit a shorter lifespan. For the frame, select robust lumber, at least 2x4 inches, capable of supporting the weight of tools and materials. The tabletop should be constructed from multiple thinner boards for greater stability and to minimize warping.
Essential Features for Compact Design
Incorporating smart design features can enhance the functionality of a compact woodworking table. Consider the following:
- Foldable or retractable legs: This allows for easy storage and maximizes floor space when the table is not in use. Consider using robust hinges and locking mechanisms for safety and stability.
- Integrated storage: Incorporate drawers, shelves, or compartments to store tools and materials, minimizing clutter and maximizing efficiency. Consider using readily available hardware such as drawer slides and shelf supports.
- Clamping system: Integrate a clamping system into the tabletop design. This could involve pre-drilled holes for clamps or integrated clamping mechanisms. This ensures workpiece stability during operations.
- Mobile base: Consider a mobile base with locking casters to facilitate easy relocation and maneuverability in tight spaces. This greatly enhances usability in confined areas.
- Modular Design: Create a modular design allowing for future expansion or customization. This ensures adaptability to evolving needs and project requirements.
Construction Process: Step-by-Step Guide
Once the design is finalized and materials acquired, the construction process can begin. The following steps outline the process of building a compact woodworking table:
Building the Table Frame
Begin by cutting the lumber to the specified dimensions for the table frame. Assemble the frame using wood glue and screws. Ensure the frame is square and stable before proceeding. Pre-drill holes before screwing to prevent splitting the wood. Use a combination square and level to ensure accuracy and prevent any structural instability.
Constructing the Tabletop
The tabletop should be constructed from multiple thinner boards, typically 1 inch thick, to minimize warping. These boards should be carefully joined using wood glue and screws, creating a strong and level surface. Ensure that the boards are aligned accurately and clamped securely while the glue dries. Once the glue is fully cured, you can sand the tabletop smooth using successively finer grit sandpaper.
Integrating Storage and Clamping Mechanisms
Once the frame and tabletop are complete, incorporate the chosen storage features. This might involve attaching drawers, shelves, or creating compartments within the frame. Similarly, install the chosen clamping system, ensuring that it is securely attached and functional. Pre-drilling pilot holes is essential to prevent damage to the wood.
Attaching the Tabletop to the Frame
Carefully position the tabletop onto the completed frame. Use wood glue and screws to secure the tabletop to the frame. Ensure that the tabletop is level and aligned correctly. Pre-drilling pilot holes is critical to prevent splitting of the wood.
Finishing Touches
Once the table is assembled, apply a finish to protect the wood and enhance its appearance. This could involve staining, painting, or applying a clear sealant. Allow sufficient drying time before using the table. Sanding between coats is crucial for a smooth and even finish. Consider adding non-slip material to the tabletop to enhance the grip on workpieces.
Safety Precautions
Throughout the construction process, prioritize safety. Always wear appropriate safety glasses and hearing protection. Use caution when operating power tools, and ensure proper ventilation when working with paints or stains. Keep the work area clean and organized to minimize the risk of accidents.
Optional Enhancements
To further customize and enhance your compact woodworking table, consider the following options:
- Adding a vise: Integrating a bench vise enhances clamping capabilities and adds significant functionality.
- Installing power outlets: Installing power outlets near the table provides convenient access to power for tools.
- Incorporating a dust collection system: This reduces dust buildup and improves workshop hygiene.
- Adding a drawer for small parts and tools: This dedicated storage increases organization and efficiency.
By following this guide, you can successfully build a compact yet fully functional woodworking table tailored to your specific needs and space constraints. Remember that proper planning, precise execution, and attention to detail are key to creating a durable and efficient workspace.


0 comments:
Post a Comment