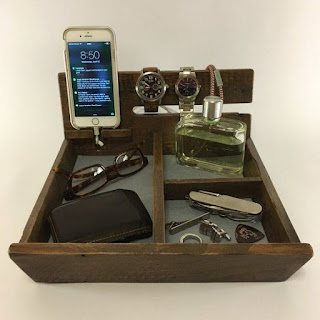
DIY Valet Woodworking Projects for Small Spaces
The modern home, particularly in urban environments, often prioritizes space optimization. This necessitates creative solutions for storage and organization, and a valet stand, while seemingly a luxury item, can become a surprisingly practical and space-saving addition. This article explores several DIY valet woodworking projects tailored for small spaces, emphasizing efficient design and maximizing functionality within limited dimensions.
Designing for Small Spaces: Key Considerations
Before embarking on any woodworking project, careful planning is paramount. For small spaces, this is especially crucial. The following considerations are key to successful valet stand design:
Minimizing Footprint
The primary goal is to minimize the stand's overall footprint. This can be achieved through several strategies. Consider a narrow, tall design instead of a wide, shallow one. A slim profile allows the valet to fit snugly into a corner or against a wall without overwhelming the room. Explore designs that maximize vertical space, utilizing multiple tiers for clothing and accessories.
Multi-Functionality
Incorporating additional functionality into the design increases the valet's value. Consider adding features such as:
- Built-in drawers: Small drawers can provide storage for smaller items like jewelry, watches, or cufflinks.
- Shelves: Open shelving can be used for folded garments or accessories.
- Hooks: Strategically placed hooks can accommodate bags, scarves, or belts.
- Mirror integration: A small mirror can be incorporated into the design for added convenience.
Material Selection
The choice of wood significantly impacts the final product's aesthetics and durability. Consider these factors:
- Hardwoods: Offer superior durability and a refined look. Examples include oak, maple, and cherry. However, hardwoods are generally more expensive.
- Softwoods: More affordable and easier to work with, but might not be as durable. Pine and fir are common choices for DIY projects.
- Plywood: A cost-effective option with good strength-to-weight ratio. Consider using plywood for the base and internal components to minimize weight and cost.
Style and Aesthetics
The valet stand should complement the existing décor of the room. Consider the overall style of your home – modern, traditional, rustic – and choose a design that harmonizes with it. The finish also plays a vital role in the final appearance; staining, painting, or leaving the wood natural are all viable options.
DIY Valet Stand Projects for Small Spaces
Here are three distinct DIY valet stand projects suitable for small spaces, each with varying levels of complexity:
Project 1: The Minimalist Valet
This project focuses on simplicity and efficiency. It consists of a narrow, freestanding unit with a single garment rod, a small shelf, and a few hooks. The materials required include: a narrow piece of wood for the base, a dowel or rod for the garment rack, small wooden blocks for shelf supports, hooks, and wood glue, screws, and stain or paint.
The construction involves attaching the base to the shelf supports, mounting the garment rod securely, and affixing the hooks. This project is ideal for beginners and can be completed within a weekend.
Project 2: The Multi-Tiered Valet
This project incorporates multiple tiers to maximize storage capacity. The design can include two or three shelves, a garment rod, and hooks. Materials required are similar to the minimalist valet, but with additional lumber for the shelves and potentially a more elaborate base.
Constructing this project requires careful measurement and precise cuts to ensure stability and alignment. Dovetail joints or robust dowel joints are recommended for added strength.
Project 3: The Corner Valet
This project maximizes corner space by utilizing a triangular or L-shaped design. It typically includes a garment rack, a small shelf, and hooks. This design requires more precise planning and cutting, particularly when creating the angled supports. Materials include lumber for the base and shelves, a garment rod, and potentially specialized corner brackets for enhanced stability.
This project is suitable for intermediate woodworkers who are comfortable working with angles and more complex joinery techniques. Miter cuts and robust joinery are crucial to ensure stability and longevity.
Advanced Considerations
For those seeking more advanced projects, consider incorporating these features:
Hidden Storage
Integrate drawers or compartments within the valet stand to conceal items such as accessories or folded clothing. This requires careful planning and precise joinery to create smoothly functioning drawers.
Customizable Features
Incorporate features such as adjustable shelves or removable components to cater to changing storage needs. This adds a layer of complexity to the design, but significantly enhances the valet's adaptability.
Integrated Lighting
Adding small LED lights can enhance the valet's functionality and aesthetics, particularly if incorporated within the shelves or around the garment rod. This requires working with electrical components, so proper safety precautions are essential.
Conclusion
Designing and building a DIY valet stand for a small space presents a rewarding woodworking challenge. By carefully considering the design elements discussed above and selecting a project that aligns with your skill level, you can create a functional and aesthetically pleasing piece of furniture that enhances the organization and style of your home. Remember to prioritize safety and accuracy throughout the construction process to ensure a durable and long-lasting valet stand.


0 comments:
Post a Comment